 Recently, we talked about the importance of following the ASTM-F-2170 standard when installing concrete flooring. In that post, we discussed the consequences of attempting to build on concrete that isn’t quite ready, including damage to the newly-installed materials and costly callbacks.
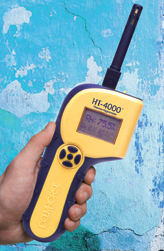
However, what is the process for measuring relative humidity (RH) in a concrete slab with a thermo-hygrometer? Today, we wanted to give you a reference for how the process of measuring RH in a concrete slab usually works, using an example from the HT-4000 owner’s manual.
Preparing to Test the Slab
When you’re getting ready to check the RH conditions inside of a slab, it is important to verify the following:
-
Slab Thickness.
-
Slab Area.
-
RH of the Area/Room where the Slab is located.
-
Potential Moisture Sources.
The thickness of the slab is critical to know so that you can drill a hole that is sufficiently deep for testing (but not too deep), and the area of the slab is used to determine how many test sites you’ll need to follow the ASTM standard.
The RH measurement of the area and finding sources of moisture is used primarily to give you an idea of why a concrete slab may not be curing according to schedule if RH readings within the slab are high.
Step One: Selecting Test Sites
When choosing test sites, keep an eye out for areas of the slab that potentially have a level of moisture, such as near the source of a leak, where the slab is thicker than normal, and within three ft. of each exterior wall for on-grade and below-grade slabs.
How many test sites should you select? For the first 1,000 square ft. of a slab, you should have a minimum of three test sites. For each additional 1,000 sq. ft. of slab, you should add at least one additional test site.
For example, if you’re testing a <1,000 sq. ft. slab, then you should have three test sites, and if you’re testing a 1,001-2,000 sq. ft. slab, you should have four test sites, and at 2,001-3,000 sq. ft., you should have at least five test sites, and so on. If you believe there are more potential trouble spots in your concrete slab than are required to meet your minimum testing sample requirements, it is recommended that you drill as many holes as you feel reasonable to provide a complete assessment.
Step Two: Drill the Holes
Once you’ve identified all of the testing sites that you need to verify the RH conditions within the slab, it’s time to start drilling.
Using a rotary hammer drill, create a hole of 5/8” to a depth of 40% of the slab’s thickness. For best results, us a drill bit specifically designed for rotary drills that possesses three or four cutting edges. This helps to ensure a smooth, round cutting hole.
Here, knowing the exact thickness of the slab is important, as holes which are too deep or too shallow may throw off reading results.
Step Three: Clean the Holes
Use a vacuum to remove the loose debris that may be left over from the holes that you’ve drilled. Then, take a stiff wire brush to clean the sides and bottom of each hole. This should knock loose and stray concrete.
After you’ve finished using the wire brush to clean each hole, run the vacuum through the hole again to pick up newly loosened debris. Repeat this process once or twice more as necessary.
Step Four: Insert the Sleeve
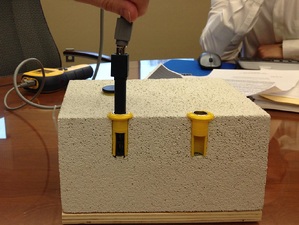
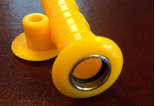
 Take the yellow sleeve designed for your RH/T-S2 sensor (the recommended concrete sensor for the HT-4000, other RH meters may specify different sensors) and insert the sleeve into the hole.
Seal the interface between the collar of the sleeve and your concrete’s surface with a water-resistant sealant, such as silicone. Use a hammer or rubber mallet to make sure that the sleeve is completely inserted into the hole and forms a seal with the concrete.
Step Five: Acclimate
Once the sleeve is fully inserted into the hole, place its protective yellow cap on it and leave the hole to acclimate for the next 72 hours.
Step Six: Test
 To test the RH of the slab, simply remove the cap and immediately insert the RH sensor to the full depth of the hole. Leave the sensor for one hour, then connect one end of the RH/T-C1 wire to the housing on the sensor, and the other end to the RH meter. Record your results for each hole.
An hour after finishing the test for the first hole, return to it and repeat the test again for each hole to check against sensor drift. The readings must not change by more than 1% RH in one hour to be considered valid.
After the sensor drift check, if your readings are validated, then you’ll know whether or not your concrete slab is ready to be built on. If not, then you’ll want to check the calibration of your RH sensor. For information on checking RH meter calibration, check out our RH Sensor Behavior and Care Guide. Sensors used for concrete should be checked no less than once every 30 days to ensure calibration.
If your slab is not ready to be built upon, repeat your test the next day, and check for potential sources of moisture intrusion or other causes for delays in the curing of your slab. Keep checking the slab every few days until it is ready. To help preserve your sensors, remove them after each day’s tests and replace the cap for the sleeve, as leaving sensors in concrete for too long can cause premature sensor drift.
While these steps are specific to the HT-4000 Thermo-Hygrometer using the RH/T-52 sensor, the steps are similar for many moisture meters. To learn more about how you can use RH meters, contact Delmhorst today, or check out our free guide to moisture meters below.
Comments