 Home inspectors have a serious responsibility to carry out: finding any and all faults in a building’s structure before a sales negotiation takes place. If you, as a building inspector, miss a major fault in a structure’s materials, it can end up costing the buyer a significant amount of money to remediate the problem, creating complaints and worse.
By thoroughly analyzing a building and spotting faults or needed updates/repairs, you can give the buyer much-needed negotiating strength, or warn them off of a bad purchase. Doing so reliably strengthens your reputation as a home inspector.
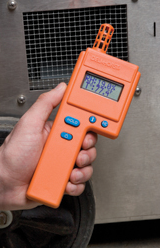
Making thorough assessments takes reliable tools and the know-how to use them. One such tool is the relative humidity gauge/sensor. Using one of these devices allows you to check the ambient moisture conditions in a structure, easily spotting abnormally high humidity that may indicate a moisture-compromised structure.
But, how can you make sure that you’re using your relative humidity gauge for the best results? Here are a few tips for using a relative humidity sensing device:
Tip #1: Regularly Check the Condition of the Sensor Material
Relative humidity gauges rely heavily on having a clean, uncontaminated sensor material to provide you with the best reading possible. As these sensors are put to use, however, they will slowly start to pick up stray contaminants such as salt particles, dust, and more.
These contaminants cause the sensor to start misreading the relative humidity (RH) in the air, a condition that is known as sensor drift. Checking the condition of the sensor material can help you make sure that your sensor will work properly. Assuming, of course, that your RH gauge is designed to be taken apart so that you can check/replace the sensor.
Tip #2: Setup Your RH Measuring Device Where It Can Get a Good Sample of a Room’s Humidity
The distribution of humidity throughout a room in a structure isn’t always uniform. Planting your RH sensor in the wrong spot can throw off reading results, giving you bad information.
Most humidity gauges come with ideal placement suggestions in their owner’s manuals.
Some basic setup advice includes:
- Not setting up near a pool of water
- Checking room temperature (this can affect RH readings)
- Avoiding corners or areas where air flow would be restricted
Your owner’s manual should have more specific advice, but these basic tips that can help you setup an RH gauge device properly.
If you’re using a hand-held unit rather than a mounted unit, placement isn’t as much of an issue. But, taking readings multiple times throughout a room can help you establish an average RH value for that room.
Tip #3: Test Each Room Multiple Times Throughout the Day
Rather than checking each room just once, it’s important to verify the validity of your RH readings by making multiple checks throughout the day. RH conditions in a structure may change from morning, to noon, to night for a number of reasons such as weather and temperature.
Also, checking rooms near the exterior after a heavy rain may be useful for helping spot a leak in the building.
Repeated testing is a cornerstone of producing reliable results. This not only helps demonstrate the thoroughness of your RH testing, it helps you spot issues that you may have missed otherwise.
Using these basic tips can help you get the most out of your RH gauge, building your home inspection reputation and authority.

Comments